Interface and Application Programming
Individual Assignment
Write an application that interfaces a user with an input and/or output device that you made
Group Assignment
Compare as many tool options as possible.
Individual Assignment
In my final project i have to do show the drip monitoring in web and blynk so here i have
Created a web interface with NodeMCU ESP8266 and blynk app
-
Web interfacing
-
Blynk App
Bylnk
Most popular Internet of Things platform with free Cloud, iOS and Android mobile apps, Web dashboard, and Machine Learning. The website is https://blynk.io/
There are three major components in the platform:
Blynk App - allows to you create amazing interfaces for your projects using various widgets we provide. Blynk Server - responsible for all the communications between the smartphone and hardware. You can use our Blynk Cloud or run your private Blynk server locally.
Blynk Server - responsible for all the communications between the smartphone and hardware. You can use our Blynk Cloud or run your private Blynk server locally. It’s open-source, could easily handle thousands of devices and can even be launched on a Raspberry Pi.
Blynk Libraries - for all the popular hardware platforms - enable communication with the server and process all the incoming and outcoming commands.
Blynk was designed for the Internet of Things. It can control hardware remotely, it can display sensor data, it can store data, vizualize it and do many other cool things.
Blynk App -Features
Similar API & UI for all supported hardware & devices
Connection to the cloud using:
WiFi
Bluetooth and BLE
Ethernet
USB (Serial)
GSM
-
Set of easy-to-use Widgets
-
Direct pin manipulation with no code writing
-
Easy to integrate and add new functionality using virtual pins
-
History data monitoring via SuperChart widget
-
Device-to-Device communication using Bridge Widget
-
Sending emails, tweets, push notifications, etc.

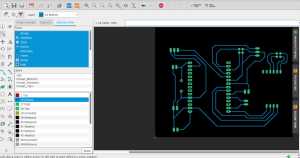
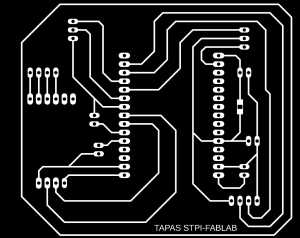
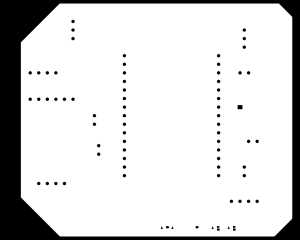
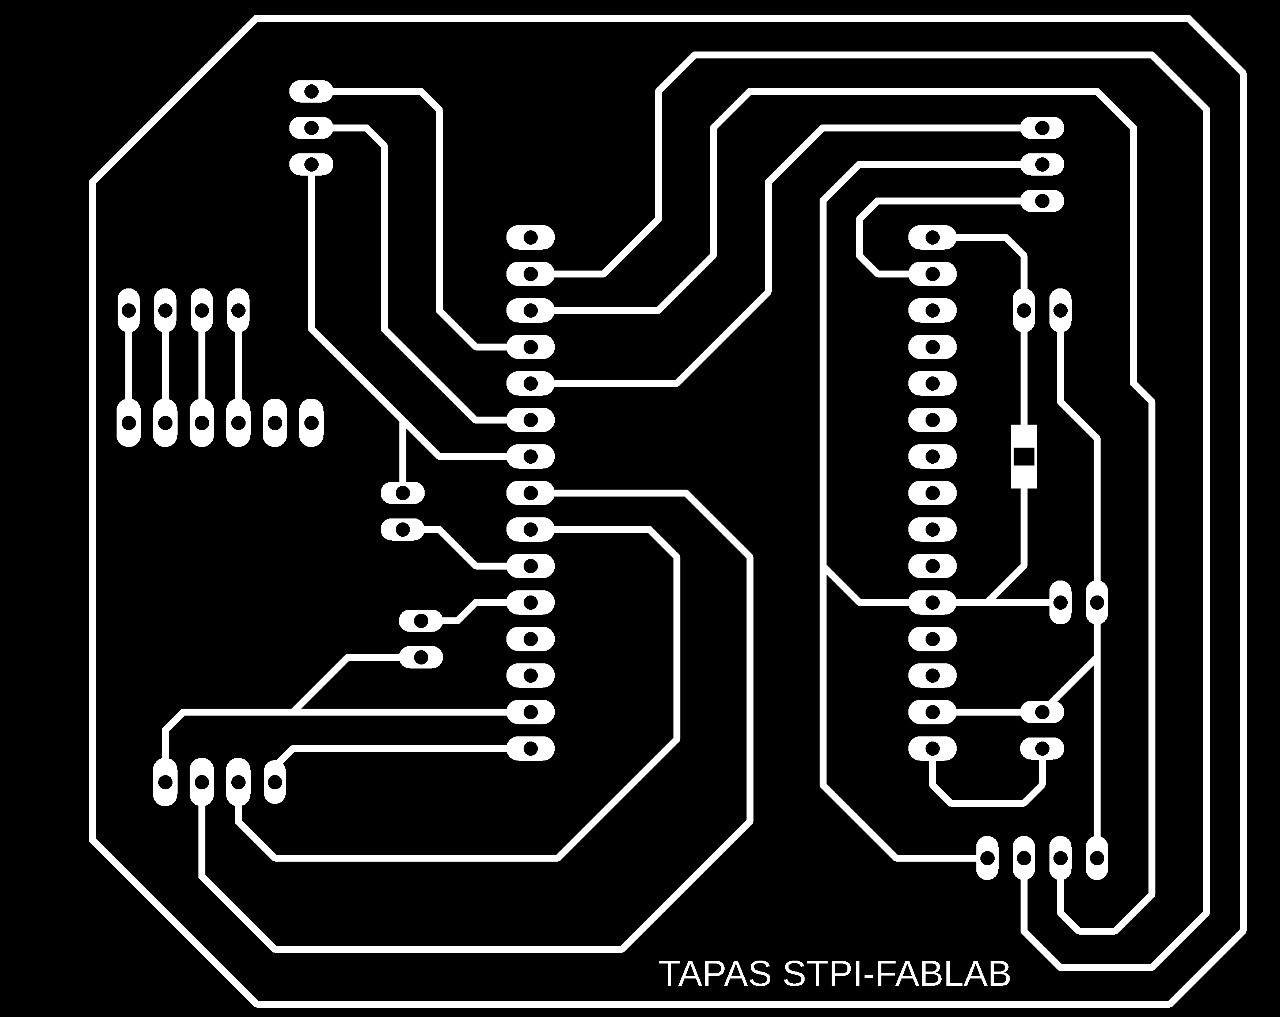
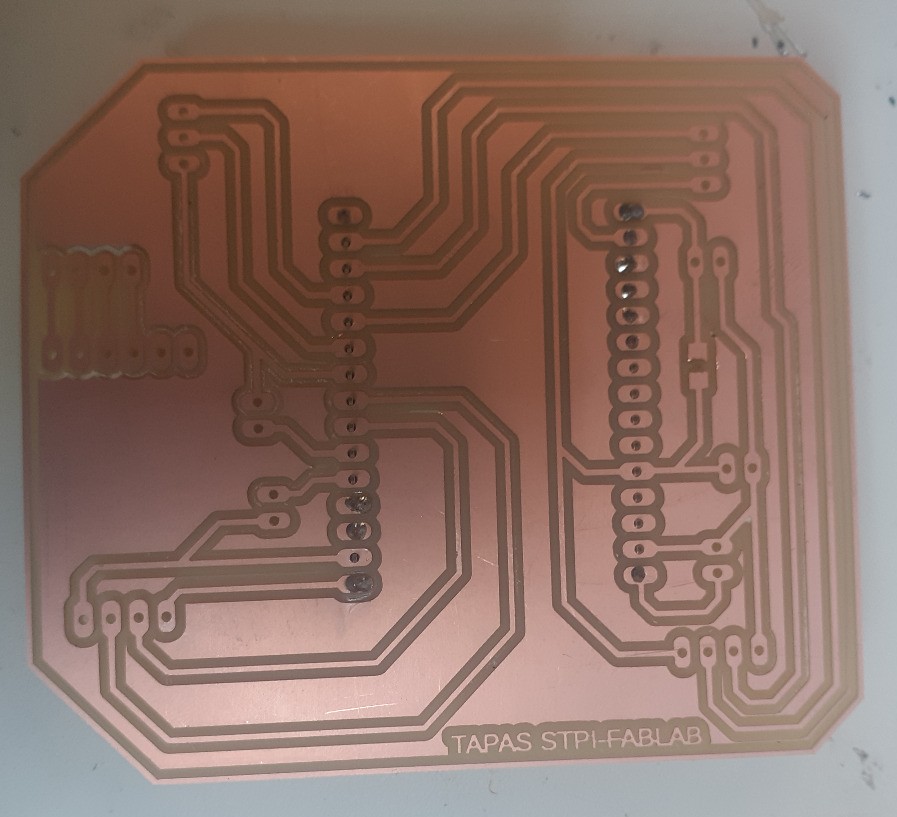
In my final project IOT based drip monitoring i have designed PCB for nodemcu esp8266 with its input photo transistor output as oled,Lodcell.i have integrated interfacing blynk and web in nodemcu esp8266


The best way to describe Blynk is that it's a IoT (internet of things) platform designed to connect deviced to the internet using user-designed smartphone apps. Below i'll try to explain briefly how I connected Blynk to control my Servo (from previous assignment).
Connecting and Arduino with a Blynk app requires 3 main steps:
- Deigning Blynk app
- writing the Arduino Code with Blynk controls
- Using Terminal to send/receive data to Arduino via wifi and USB
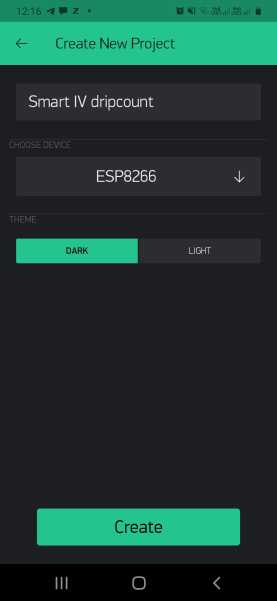
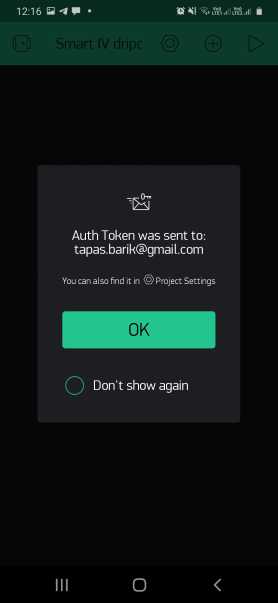
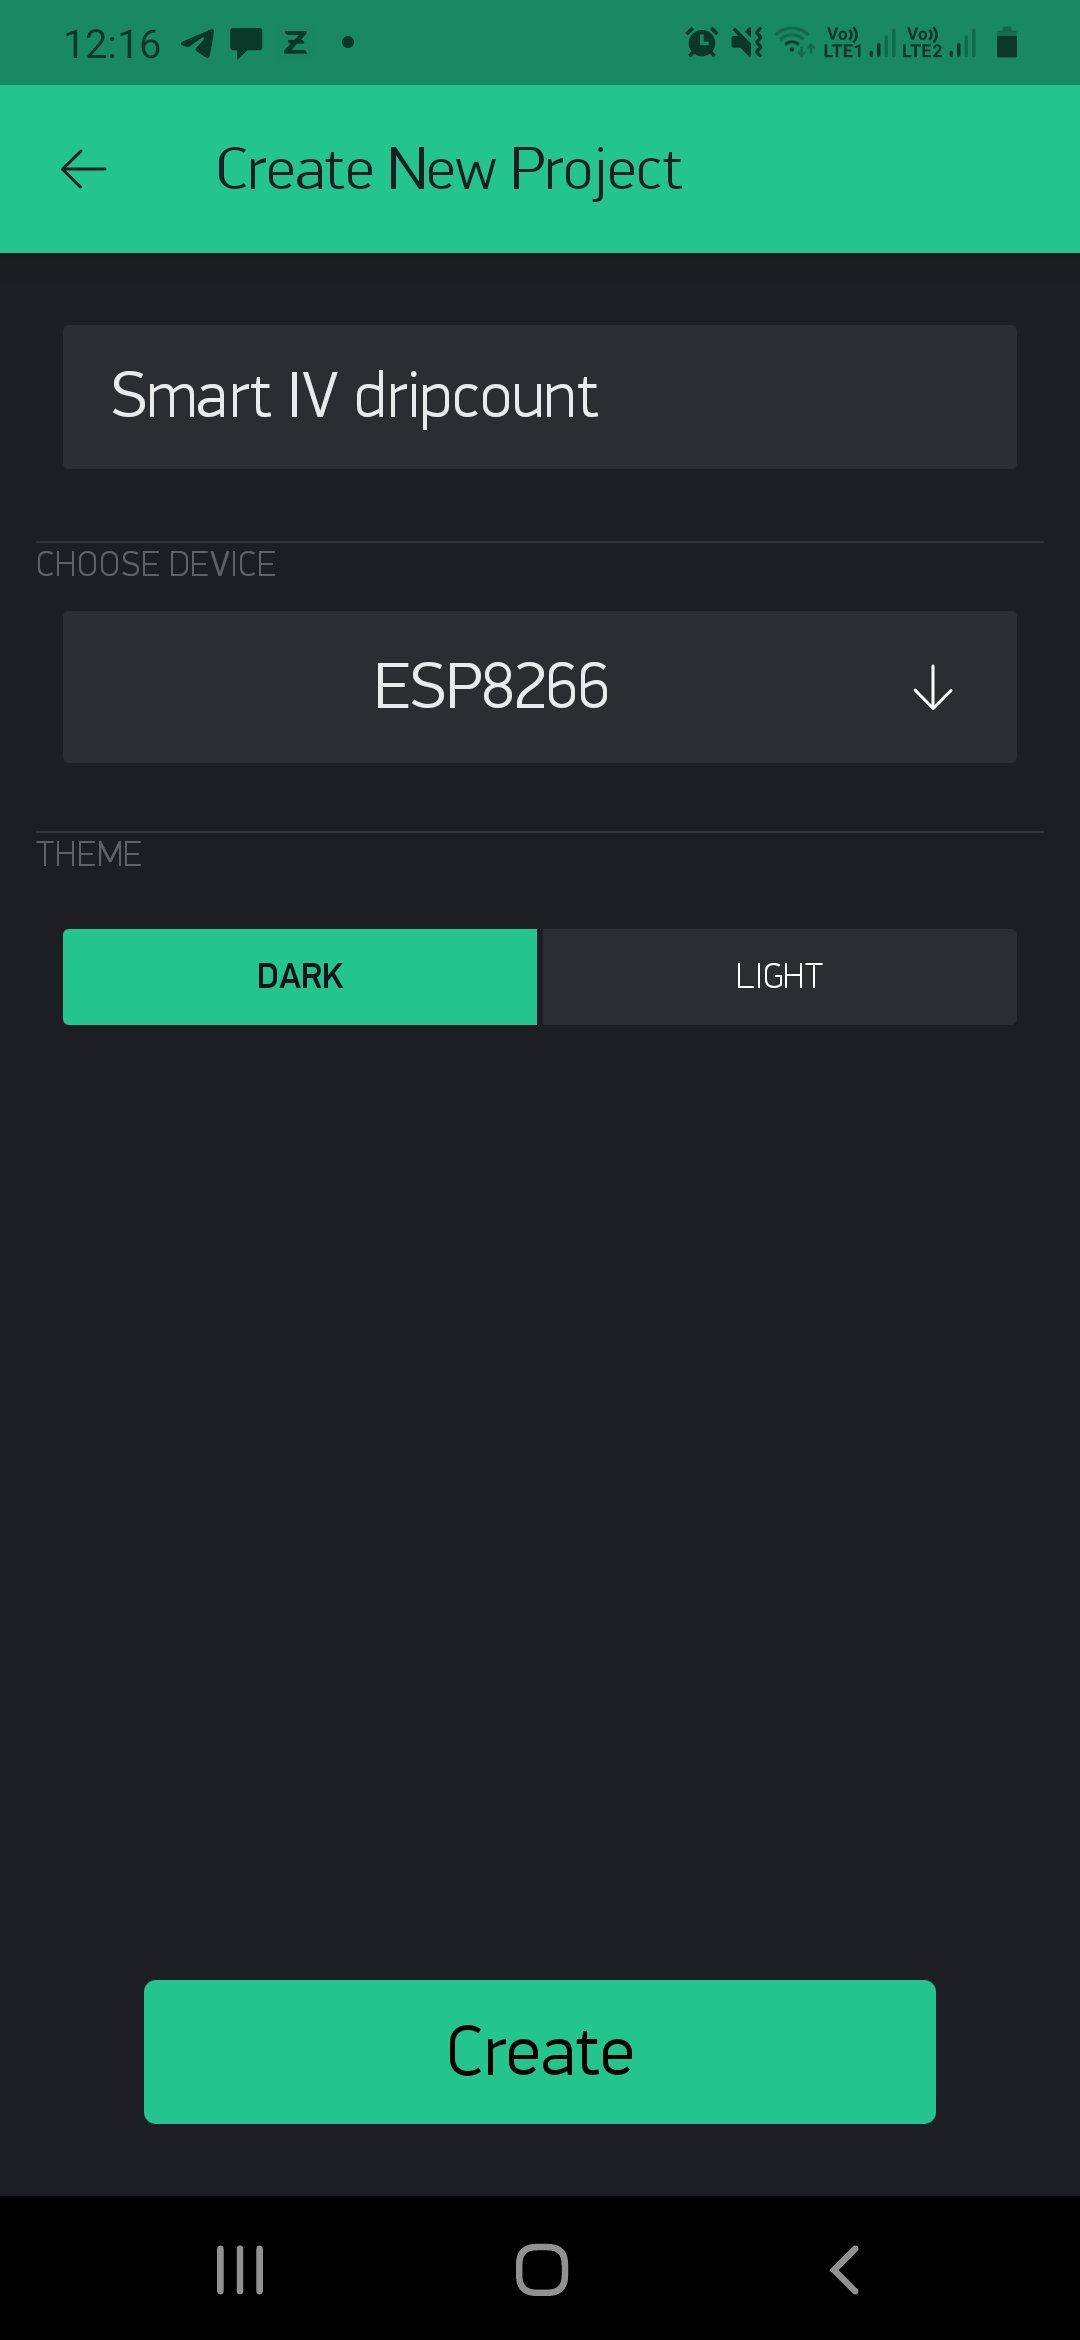
The first step is to create a new project in the Blynk App installed in my phone.
Simply following this procedure will allow users to create new project.:
New Project >> Input Project Name>>Choose Device>>Connection Type
The
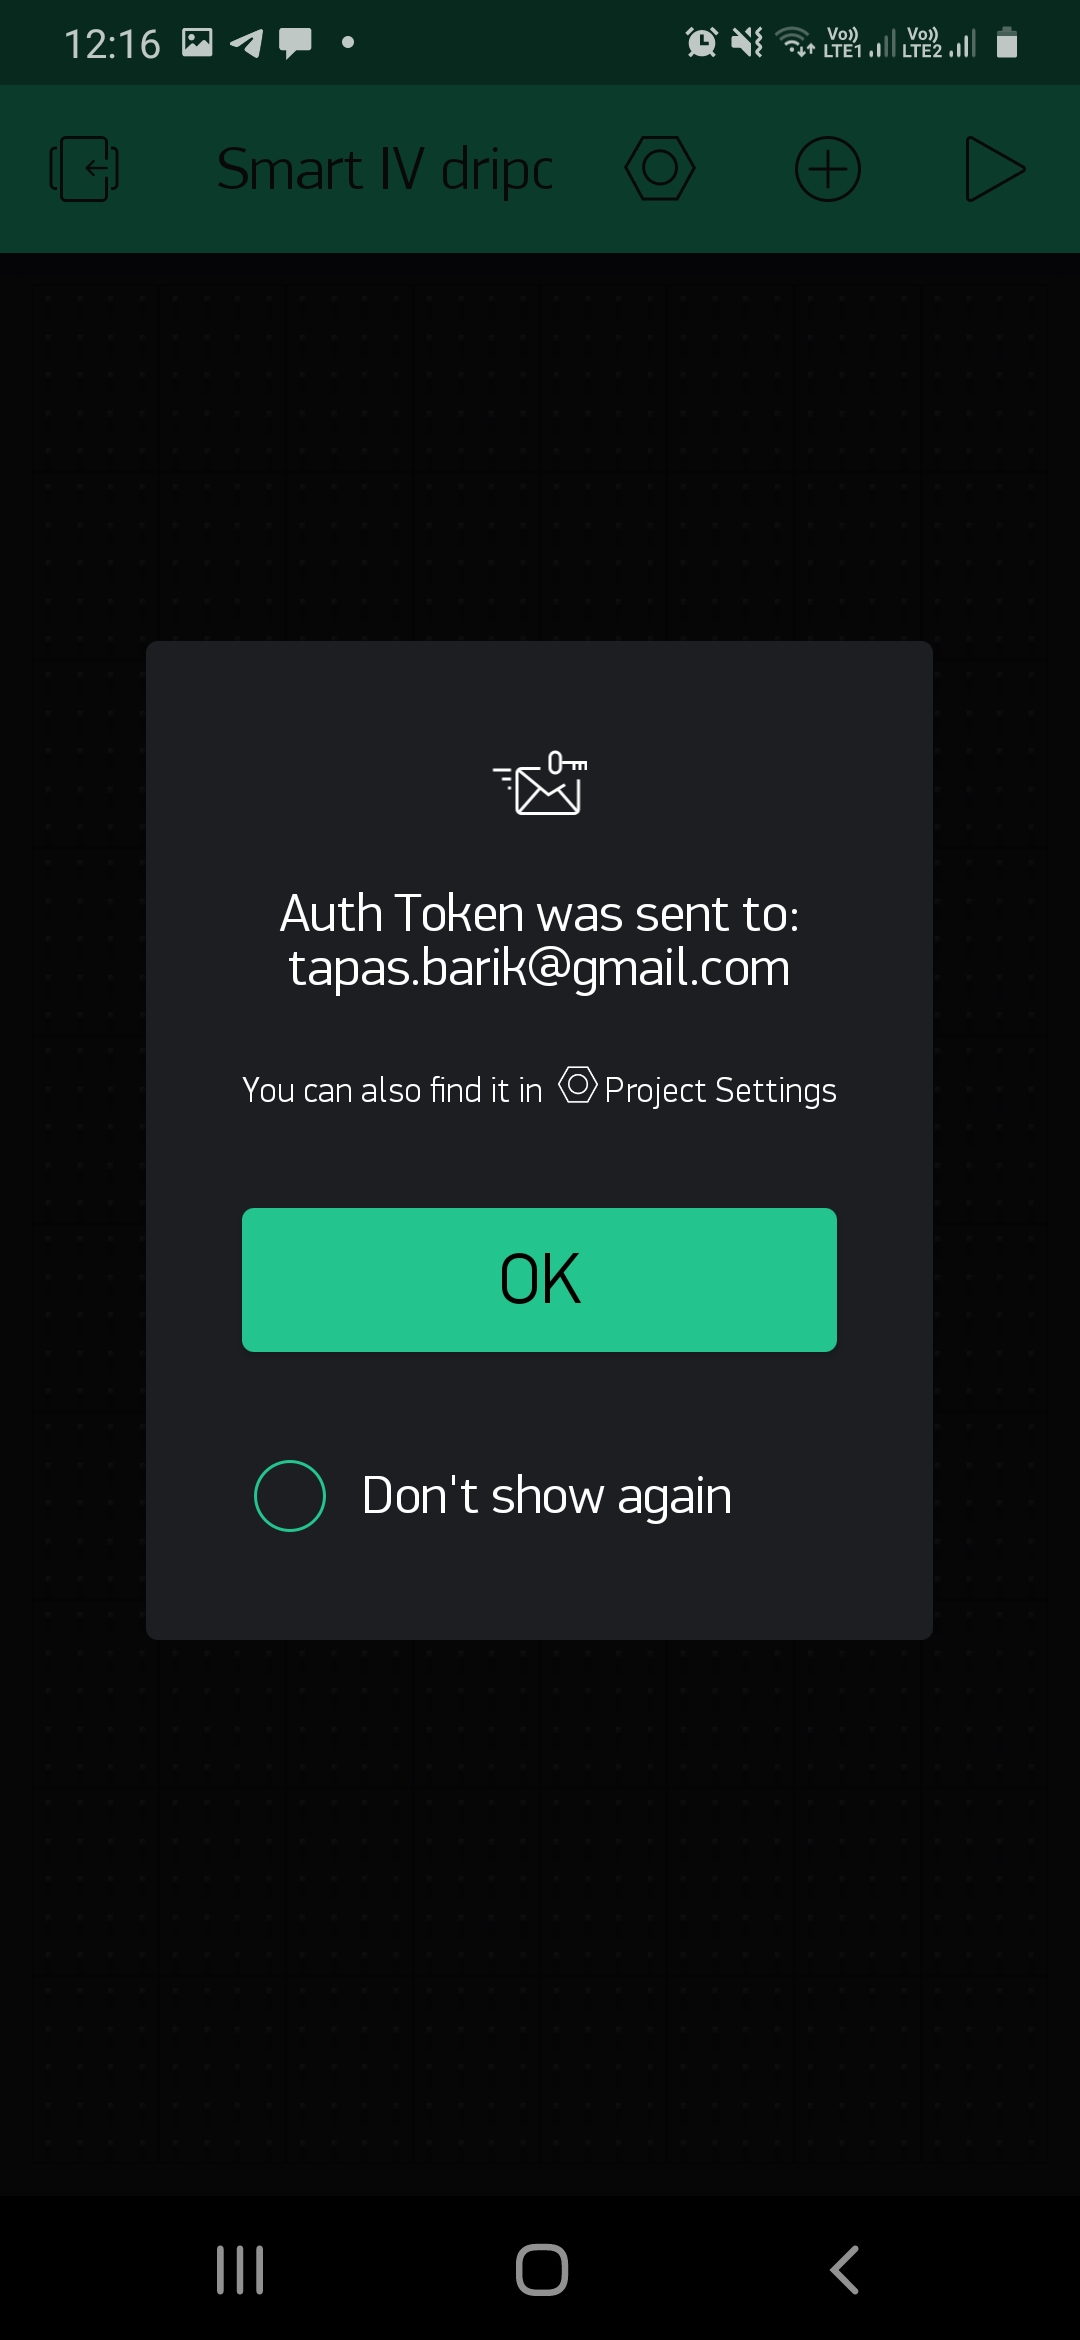
The Token will be sent automatically via email after creation of project.
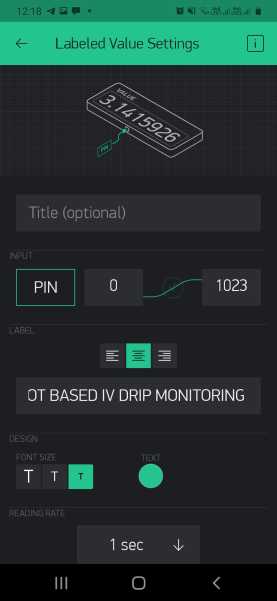
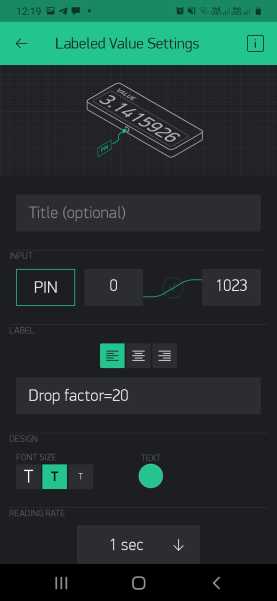
Adding Widgets The second step is to add widgets to the interface.
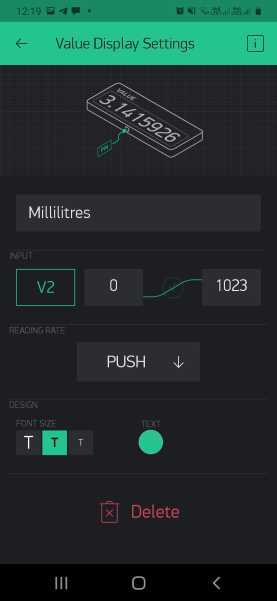
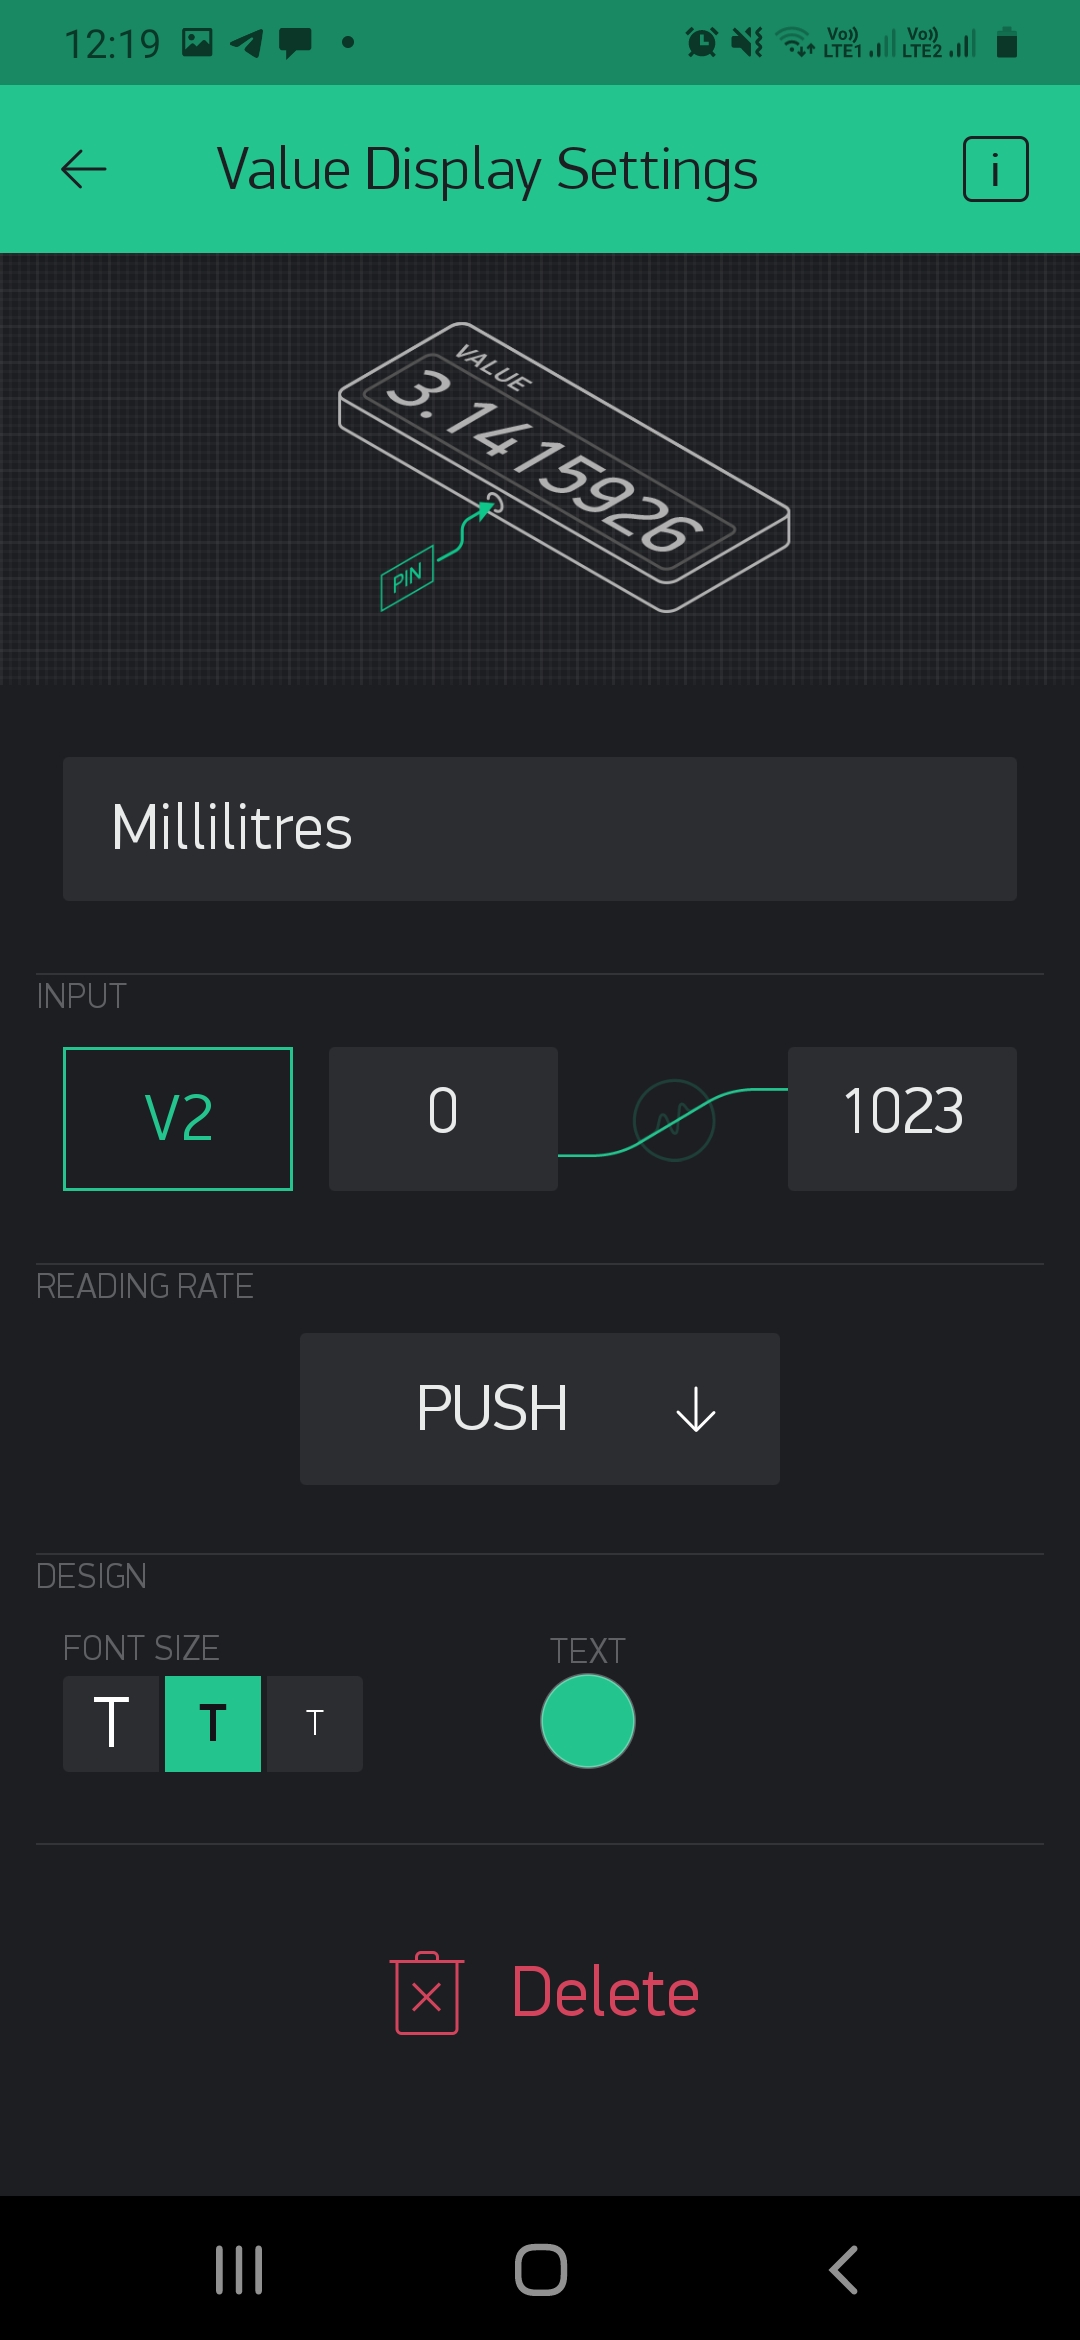
For output display of liquid i.e value display output pin is V2 for for millilitres
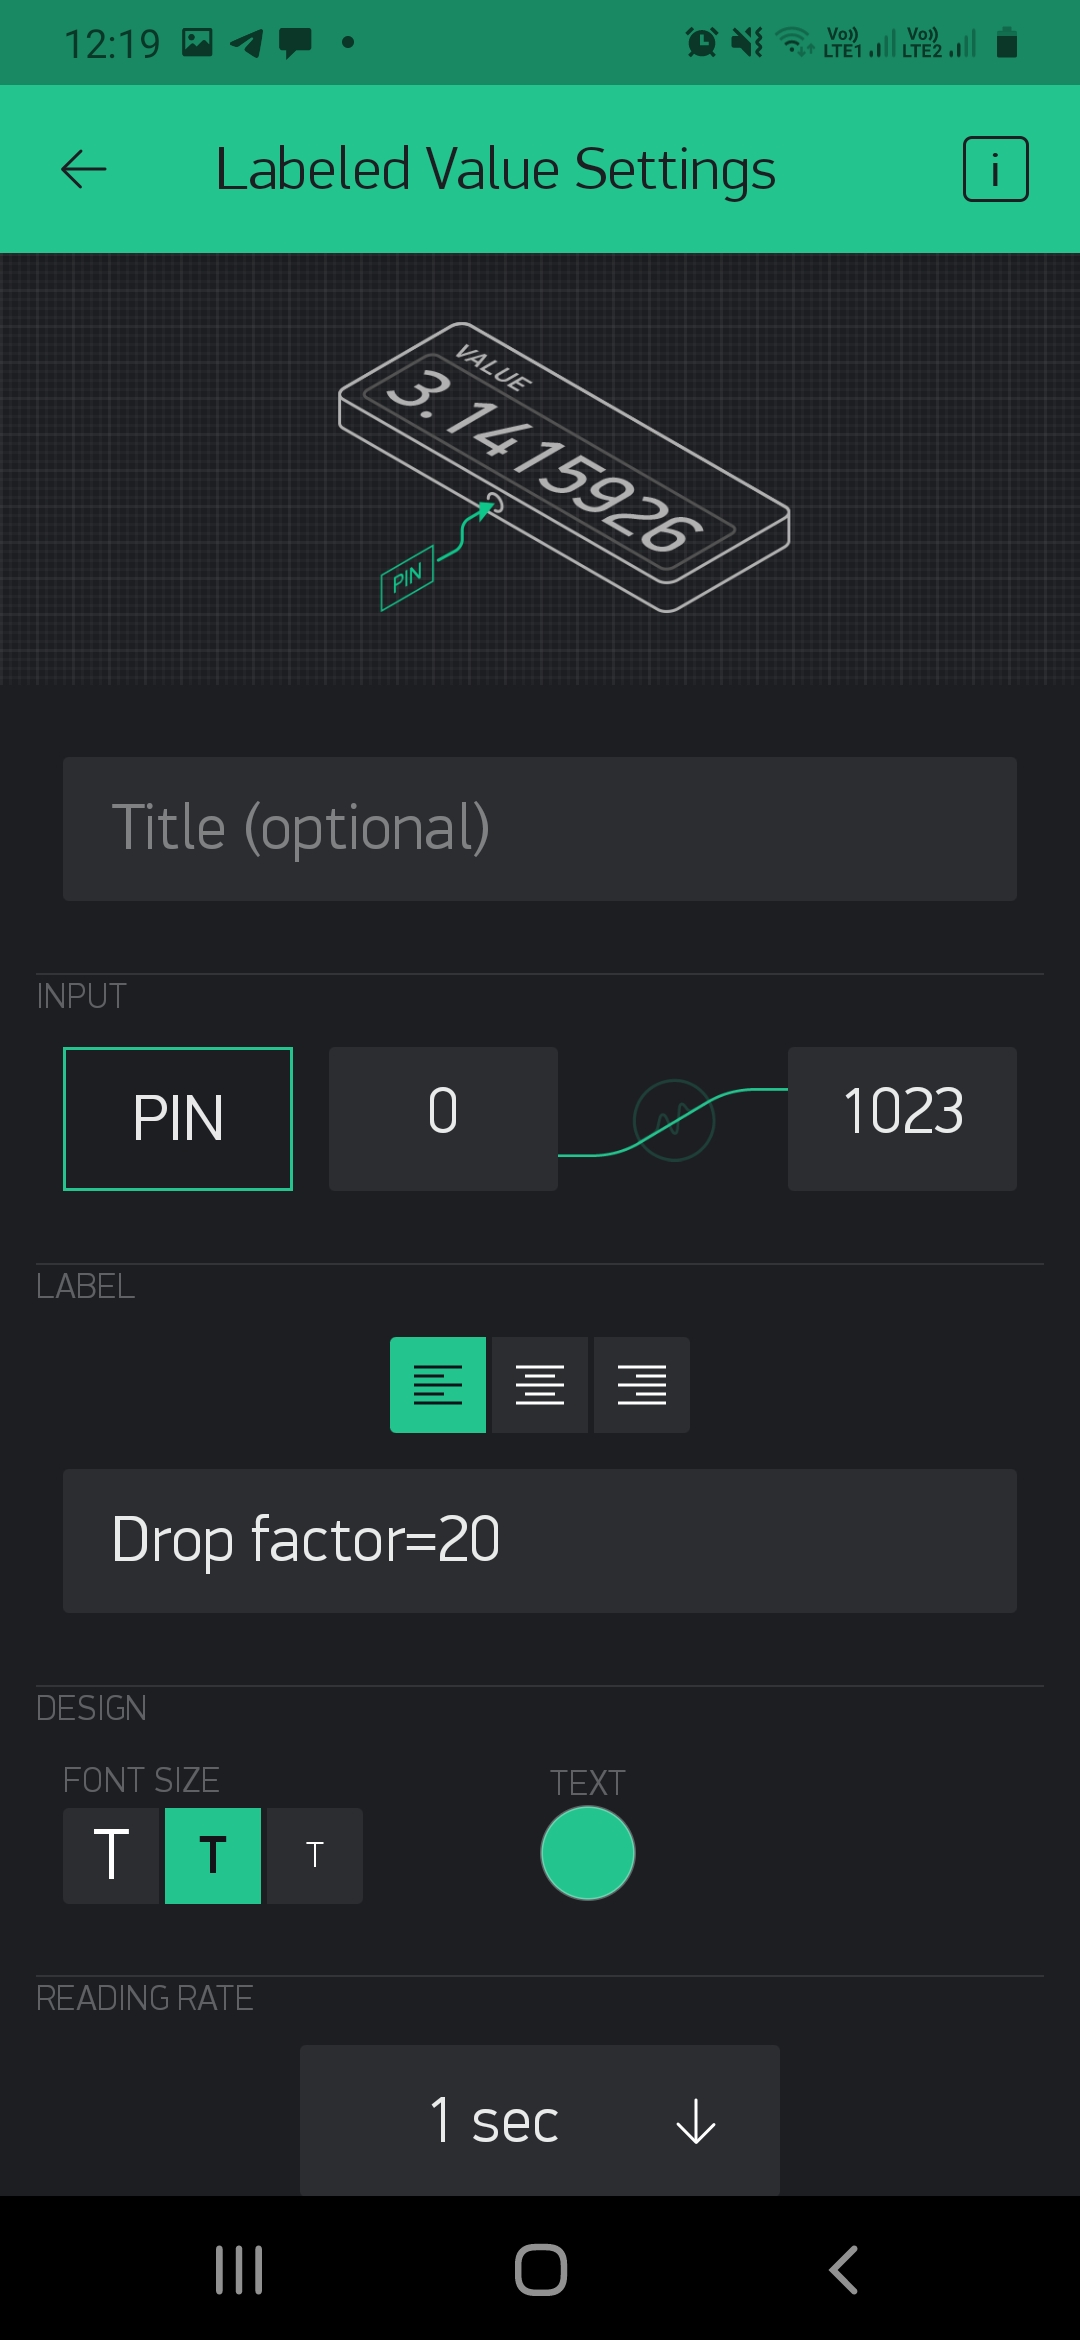
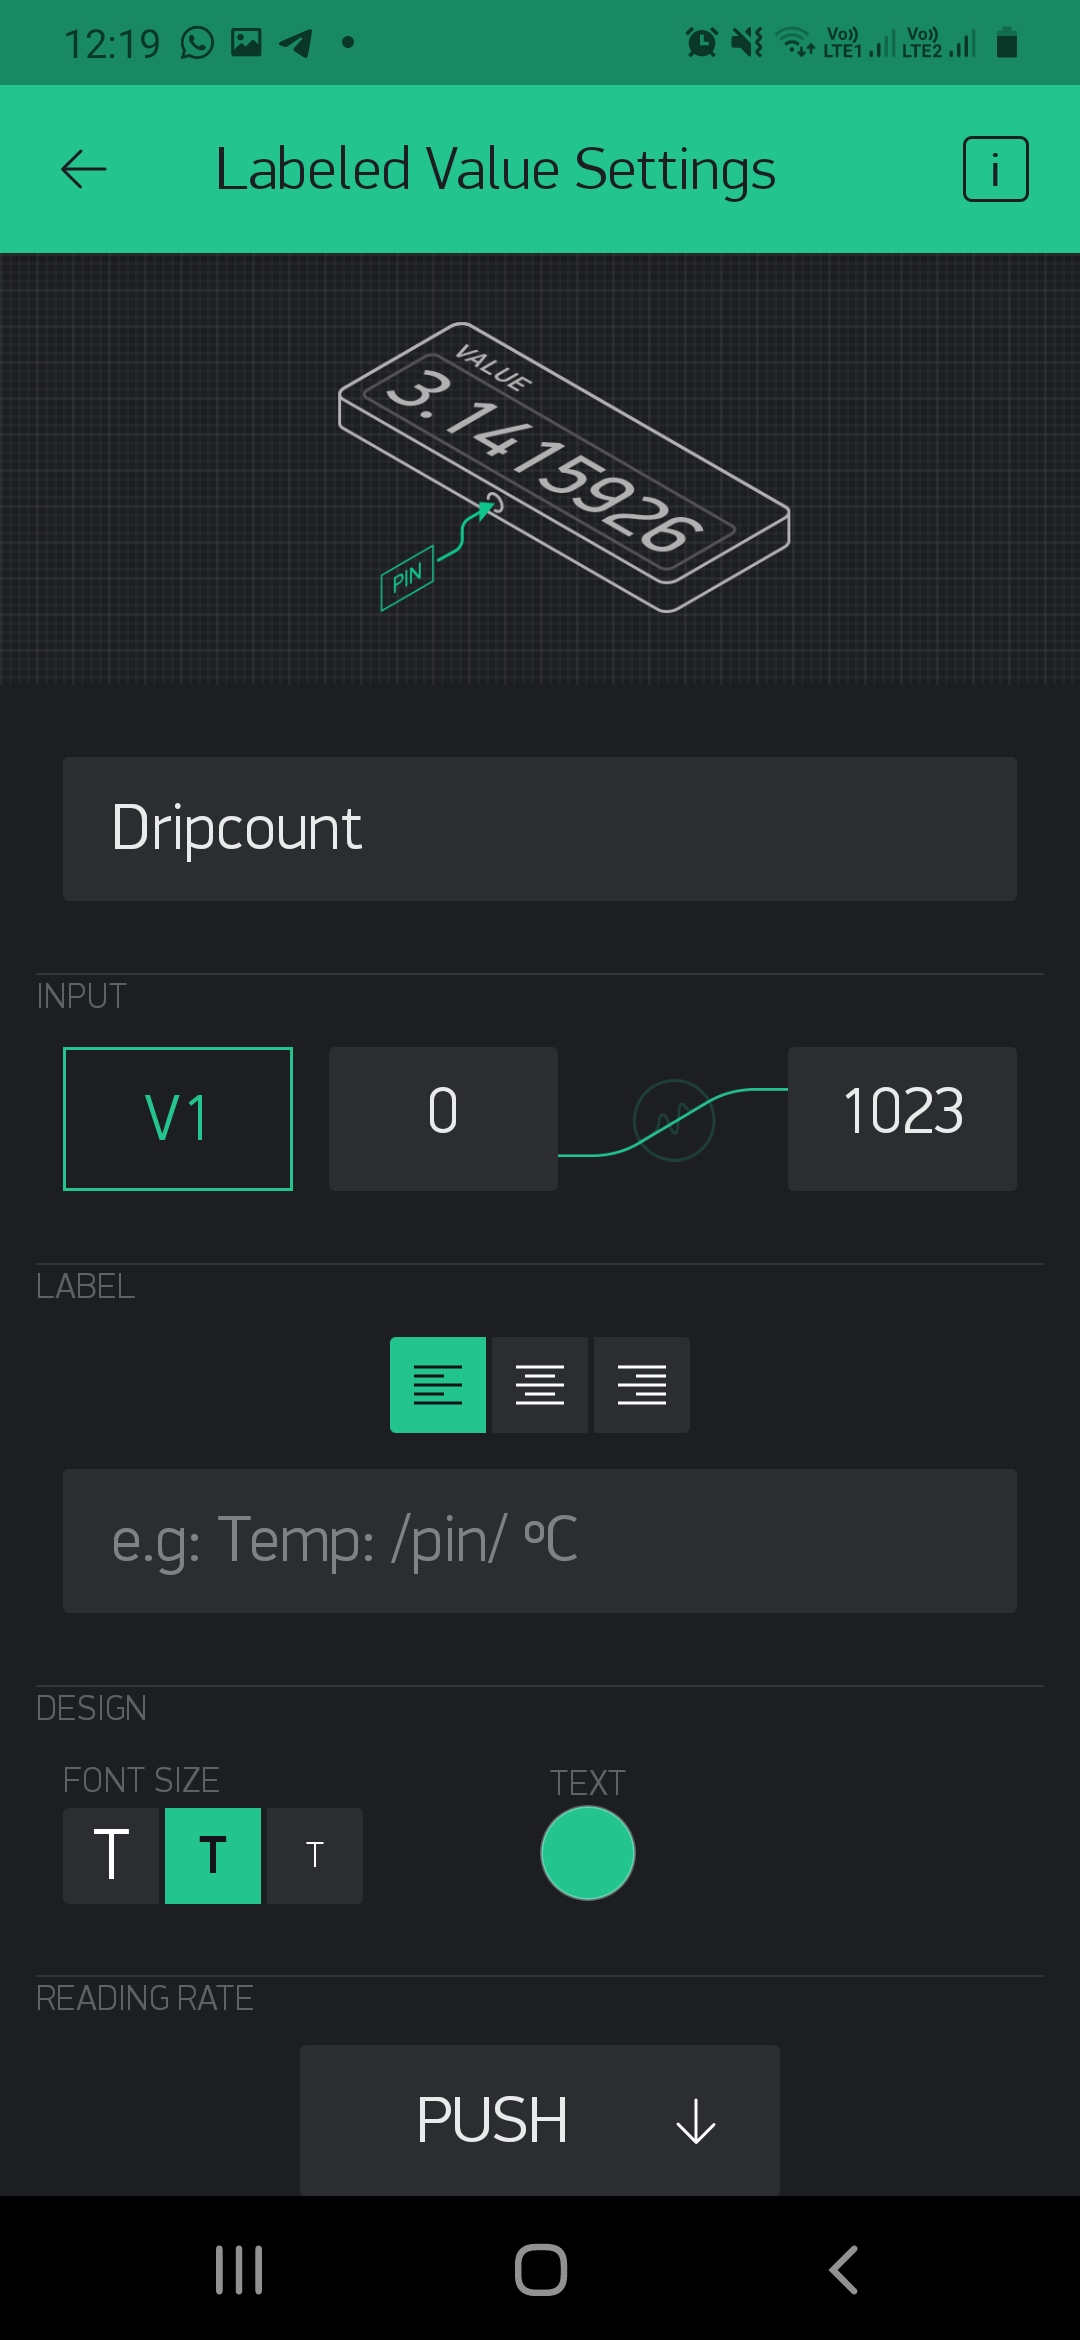
For output display for drip i.e labeled value setting pin is V1 for drip count

blynk libaray i have been download from the girhub
https://github.com/blynkkk/blynk-library/blob/master/src/BlynkSimpleEsp8266.h
ad the following is the code
Write an application that interfaces a user with an input and/or output device that you made
Group Assignment
Compare as many tool options as possible.
Web interfacing
Blynk App
Most popular Internet of Things platform with free Cloud, iOS and Android mobile apps, Web dashboard, and Machine Learning. The website is https://blynk.io/
There are three major components in the platform:
Blynk App - allows to you create amazing interfaces for your projects using various widgets we provide. Blynk Server - responsible for all the communications between the smartphone and hardware. You can use our Blynk Cloud or run your private Blynk server locally.
Blynk Server - responsible for all the communications between the smartphone and hardware. You can use our Blynk Cloud or run your private Blynk server locally. It’s open-source, could easily handle thousands of devices and can even be launched on a Raspberry Pi.
Blynk Libraries - for all the popular hardware platforms - enable communication with the server and process all the incoming and outcoming commands.
Blynk was designed for the Internet of Things. It can control hardware remotely, it can display sensor data, it can store data, vizualize it and do many other cool things.
Blynk App -Features
Similar API & UI for all supported hardware & devices
Connection to the cloud using:
WiFi
Bluetooth and BLE
Ethernet
USB (Serial)
GSM
Set of easy-to-use Widgets
Direct pin manipulation with no code writing
Easy to integrate and add new functionality using virtual pins
History data monitoring via SuperChart widget
Device-to-Device communication using Bridge Widget
Sending emails, tweets, push notifications, etc.


Simply following this procedure will allow users to create new project.:
New Project >> Input Project Name>>Choose Device>>Connection Type

blynk libaray i have been download from the girhub
https://github.com/blynkkk/blynk-library/blob/master/src/BlynkSimpleEsp8266.h
ad the following is the code